
Turning images into a PDF is one of those jobs where the defaults are right about 80% of the time, and the other 20% produces something subtly wrong that you cannot quite name. Photos sitting in the middle of oversized white pages. A landscape photograph squeezed onto a portrait sheet. Pages that print with half an inch of unexplained white down one side.
All of that comes out of four options on JPG to PDF, and they are worth understanding once.
Page size: the decision that matters
You can choose Fit to image, or a standard sheet — A4, Letter, A3 or A5.
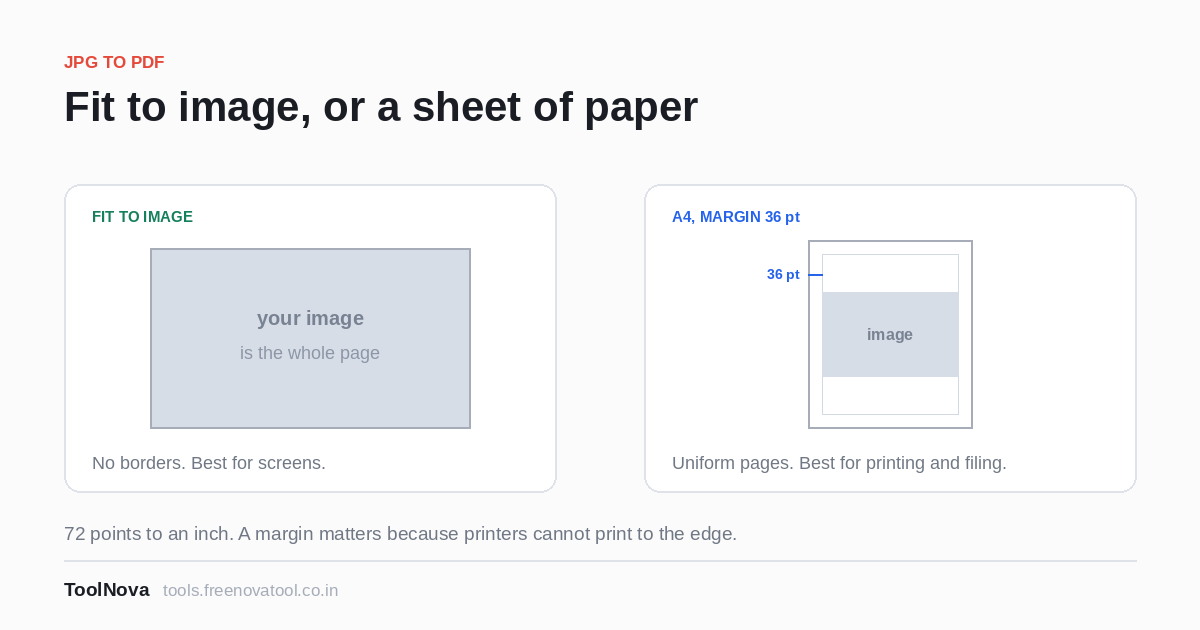
Fit to image makes each page exactly the shape of the image on it. No borders, no empty space, nothing added. A 4000×3000 photo gives a 4:3 page; a tall screenshot gives a tall page. The PDF is a faithful container for your pictures and nothing more.
A standard size puts each image onto a sheet of fixed proportions and fits it inside. Because almost no photograph has the same shape as an A4 sheet, there will be empty space — above and below a landscape image on a portrait page, or at the sides of a portrait image. That space is not a bug; it is what a sheet of paper looks like with a photo on it.
The choice follows from one question: will anyone print this?
- Screen only — a set of reference photos, a portfolio to email, receipts for your own records, a manga or comic you have scanned: Fit to image. Every pixel of the page is your picture.
- Going on paper, or into a system that expects documents — an insurance claim, a visa application, expense receipts for a finance team, anything that will be filed or stapled: A4 (or Letter in the US). Uniform pages that feed through a printer and sit in a folder.
- A3 for drawings, plans and anything wide that needs the room; A5 for booklets and handouts.
Mixing image shapes makes the case for a standard size stronger. Twenty photos of three different proportions become, with Fit to image, a PDF of twenty differently-shaped pages — which is fine on a screen and chaos in a printer.
Orientation: leave it on Automatic
The default, Automatic (match each image), decides per image: a wide photo gets a landscape page, a tall one gets portrait. Each picture gets the sheet that wastes the least space, and in a mixed set this is almost always what you want.
Force Portrait or Landscape when consistency matters more than fit. Scanned documents are the clear example — a file where some pages are portrait and some landscape is irritating to read and worse to print, so if they are all meant to be portrait pages, say portrait and accept the white space on the two that were photographed sideways.
One thing Automatic cannot do: rescue an image that is simply rotated the wrong way. A photo taken with the phone turned round is a landscape image, and automatic orientation will dutifully give it a landscape page lying on its side. Rotate it before conversion, or fix the PDF afterwards with Rotate PDF.
Margin, in points
The margin box takes a number from 0 to 120, and the unit is points: 72 points to an inch, about 28 to a centimetre. So:
| Points | Roughly | What it is for |
|---|---|---|
| 0 | nothing | The default. Screen use, photo collections, anything where the image is the content. |
| 18 | 6 mm | A thin frame. Enough to stop images bleeding into each other visually. |
| 36 | 12 mm | A document-like margin. Safe for home and office printers. |
| 72 | 25 mm | Generous. Room to write notes, or to punch holes and bind. |
Two reasons to use a margin at all. The first is that printers cannot print to the edge: most have an unprintable border of a few millimetres, and an image that runs right to the edge of the page will be clipped. The second is binding — anything going into a ring binder needs a margin on the spine side or the holes eat the picture.
If it is never going near a printer, leave it at zero. A margin is a cost paid in page area, and on screen you get nothing for it.
One PDF or many
Combine all images into one PDF is on by default, which is what almost everyone wants: a stack of images, one document, in the order you arranged them.
Turn it off and each image becomes its own single-page PDF, delivered as a zip. There are real uses — a batch of receipts that have to be uploaded individually, product shots that each need to go to a different place — but if you are turning it off because you want some grouping, it is usually quicker to make one PDF and then use Split PDF to cut it where you want.
The thing to do before you convert: order the images
The tiles can be dragged, and the order you leave them in is the page order you get. This is the only part of the job that is tedious to undo, so it is worth doing properly first.
Phone photos are the trap. They sort by filename, filenames are usually timestamps, and a document you photographed out of sequence — page 4 first because you noticed you had skipped it — arrives in the order you took the pictures, not the order the pages go. Check the sequence in the tile list, not in your file manager.
Size, afterwards
Phone cameras produce 3 to 6 MB per photograph. Fifteen of them make a PDF of 50 to 90 MB, which is past most email limits before you have done anything wrong.
This is the one case where heavy compression costs you almost nothing. The pages are photographs; there is no text layer to lose, because there never was one. Run Compress PDF at Medium and a 60 MB file of photographed pages will typically come back a fraction of the size and still be perfectly readable. The reasoning behind that is in how to compress a PDF without losing quality.
And if what you have photographed is pages of text that you will later need to search or quote from, do that step first: OCR before compression, never after. Compression at Medium or Strong throws away exactly the detail recognition depends on.